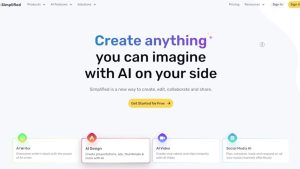
In today’s fast-paced digital world, creating high-quality videos quickly and efficiently is a must. Thanks to advancements in AI technology, it\’s now possible to generate a complete video with just a single prompt. Whether you\’re new to video creation or a seasoned content creator, this guide will show you how to create professional-looking videos featuring custom scripts, high-quality video footage, and human-like voiceovers—all from a simple text prompt. Plus, you’ll learn how to customize the final product to fit your needs and maximize your reach.
How AI Tools are Changing Video Creation

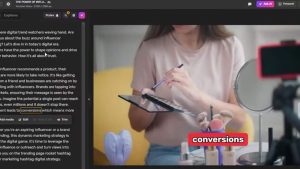
AI tools are revolutionizing the way we approach video creation. Instead of manually scripting, recording, and editing, you can now generate a video in minutes. Here’s a quick example: if you wanted a video about the power of influencer marketing in the digital era, all you would need to do is input a simple prompt. From there, the AI generates the entire video for you—complete with professional voiceovers, high-quality video footage, and on-screen subtitles.
Once the video is generated, you can make adjustments to the subtitles, voiceovers, and video style to ensure everything meets your personal or business standards. The following step-by-step guide will walk you through how to create a video from scratch using AI tools.
Step-by-Step Guide to Creating Videos with AI
Step 1: Visit the AI Tool\’s Website
The first step is to visit the AI tool website. This tool has gained significant traction recently, with millions of monthly users, particularly from regions like the United States and India. The platform offers apps for both iOS and Android, making it accessible whether you’re on a PC or mobile device.
Once you’re on the site, navigate to the \”AI Features\” option at the top bar. Then, browse to the \”AI Text to Speech Generator\” section, which allows you to convert text to a voiceover. This feature is useful for creating videos in multiple languages.
Step 2: Explore Voiceover Options
If your content is geared toward an international audience, this platform has plenty of options for generating voiceovers in different languages. For instance, if your channel targets Arabic speakers, simply choose the Arabic language option. Other languages such as Russian, French, and more are also available. For this example, let’s focus on generating an English-language video.
Step 3: Accessing the AI Text-to-Video Tool
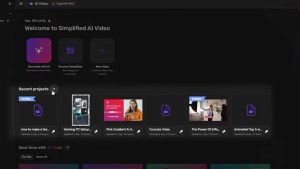
Once you’re ready to generate your video, head to the main dashboard of the AI tool. Here, you’ll see your most recent work saved automatically. Begin by clicking the \”Generate with AI\” button and then select \”AI Text to Video.\”
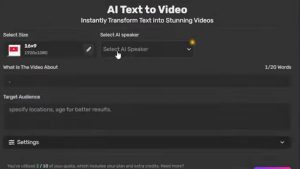
This area is called the \”Prompt Area,\” where you input the details of your video. The key here is to be as detailed and accurate as possible, describing your video topic within 20 words to ensure optimal results. For instance, if you’re creating a video on \”The Power of Influencer Marketing in the Digital Era,\” type that into the prompt box.
Choosing Video Specifications
Next, select the size of the video. For short clips, choose a smaller size, while for long-form content, select a larger option.
Then, choose an AI speaker for your voiceover. One of the unique aspects of this tool is the ability to clone your own voice. This is especially useful considering YouTube’s restrictions on repetitive AI-generated voices across multiple videos. If you prefer not to use a cloned voice, you can still select from a variety of AI voice options.
Step 4: Entering Detailed Video Information
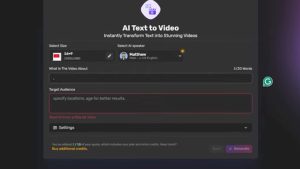
Once you’ve set the video specifications, it’s time to input the key details of your video:
- Video Topic: Accurately describe the subject of your video. The more precise your description, the better the AI can tailor the video to meet your expectations.
- Target Audience: Specify the country or region where your target audience resides. For example, type \”United States\” if that’s where your main viewership is located.
- Audience Age Range: Enter the age range of your target audience. For instance, you might type \”18 to 35\” if your content appeals to young adults.
Once all this information is input, the AI will begin generating your video. A message will pop up indicating that the video is being rendered in lower resolution for faster editing. Once completed, you can review the video and make any necessary manual changes to improve its quality.
Step 5: Customizing Subtitles and Voiceovers
One of the key elements that can set your video apart is the quality of its subtitles and voiceovers. Below, we’ll walk you through how to enhance these features to give your video a professional look and sound.
Modifying Subtitles
To improve the appearance of your subtitles, follow these steps:
- Remove Backgrounds: Click on the subtitle area, then select the color settings. You can use transparency to remove any background color from your subtitles for a cleaner, more modern look.
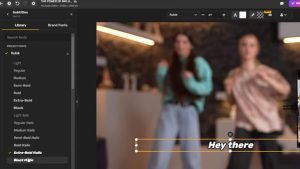
- Change Font Styles: This AI tool offers various fonts, allowing you to customize your subtitles to match your branding. For this example, using \”Extra Bold Italic\” in all uppercase letters can make the text stand out. Navigate to the \”Subtitle Choice\” section and select the style option to adjust your font.
- Subtitle Backgrounds: Choose from various subtitle background effects to enhance readability. A shimmering backdrop can give the video a unique, engaging touch. You can also adjust the font size and text case (uppercase or lowercase) to fit the tone of your video.
Changing the Voiceover
Since platforms like YouTube don’t allow repetitive voices for monetization, it’s crucial to find an alternative method. To change the voiceover, copy the subtitles and move to a third-party AI voice generator like 11 Labs, known for producing human-like voiceovers.
- Paste the Subtitles: Once inside the voice generation tool, paste your subtitles into the designated area.
- Select a Voice: Choose your preferred voiceover character, whether it’s male, female, or another style that suits your video’s tone.
- Generate the Voiceover: Click \”Generate\” to create the voiceover.
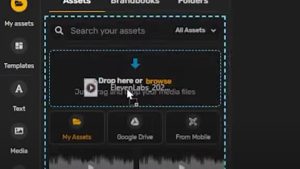
- Add the Voiceover to the Video: Return to the original AI tool and upload your new voiceover by going to \”My Assets\” and dragging the audio into the timeline.
- Mute Original Audio: To avoid issues with YouTube\’s monetization rules, mute the video’s original audio track. Click on the \”Audio Area\” and turn off the default sound, replacing it with the new voiceover you generated.
Step 6: Exporting the Final Video

After making all necessary adjustments, your video is ready to export. Simply click \”Download\” and choose the \”Full HD\” option to ensure the highest quality for platforms like YouTube, Instagram, and TikTok. The final video will be crisp and professional, ready to captivate viewers.
Conclusion: Automate Video Creation for Maximum Impact

Creating high-quality, professional videos has never been easier, thanks to AI tools that streamline the entire process—from generating scripts to adding voiceovers and video footage. With just a single prompt, you can now produce engaging content that looks polished and ready for upload.
Once you’ve mastered the process, you’ll not only save time but also be able to scale your content production, reach millions of viewers, and potentially generate thousands of dollars in revenue. The key is to experiment, stay consistent, and continuously improve your video creation process.